- Standard is a general-purpose file share using a Ceph-based backend.
- VAST is a high-performance file share type that is available in selected GPU-enabled regions.
File share types are mutually exclusive, meaning each region has either Standard or VAST file shares, never both.
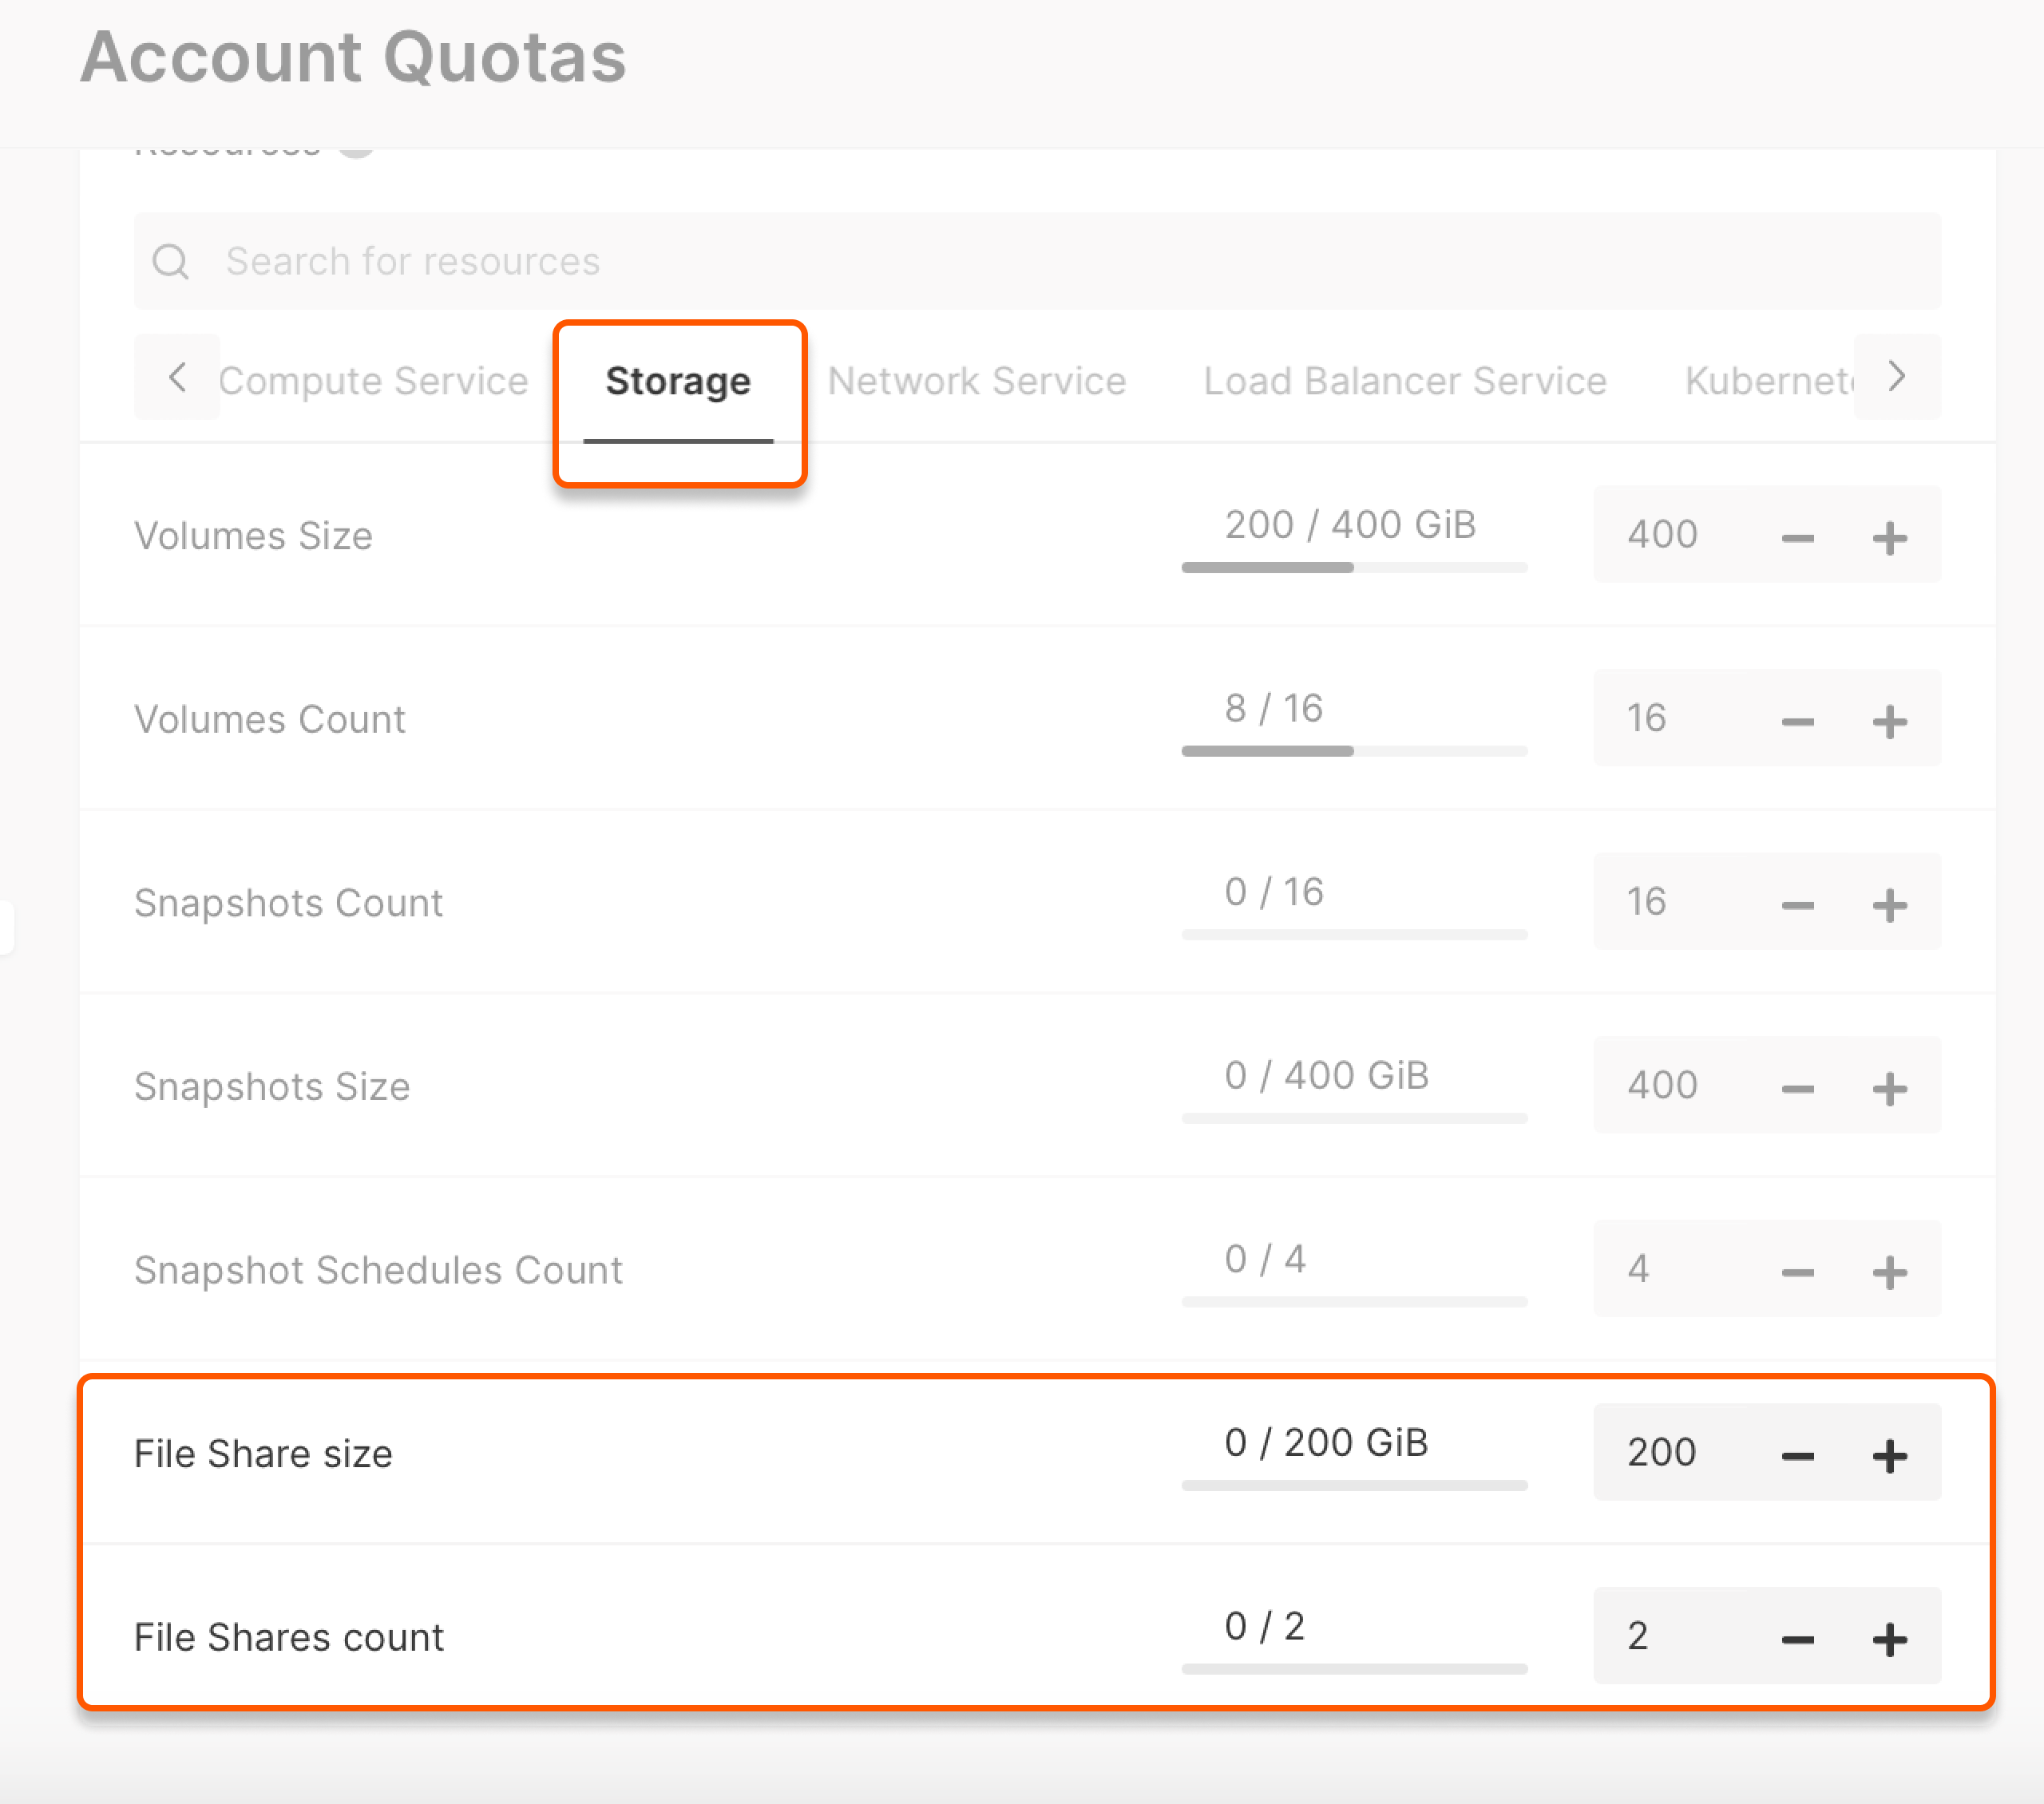
Before configuring, you should have enough quotas to create a file share. To increase quotas, send us a request according to our guide. The quotas for File Shares are located on the Storage tab and include File Share count and File Share size (GiB).
Prepare your network for Bare Metal
If you plan to mount the file share on a bare-metal server, the network must support bare-metal, and these servers require a dedicated VLAN. If needed, create a new network and enable the Bare Metal Network toggle during configuration.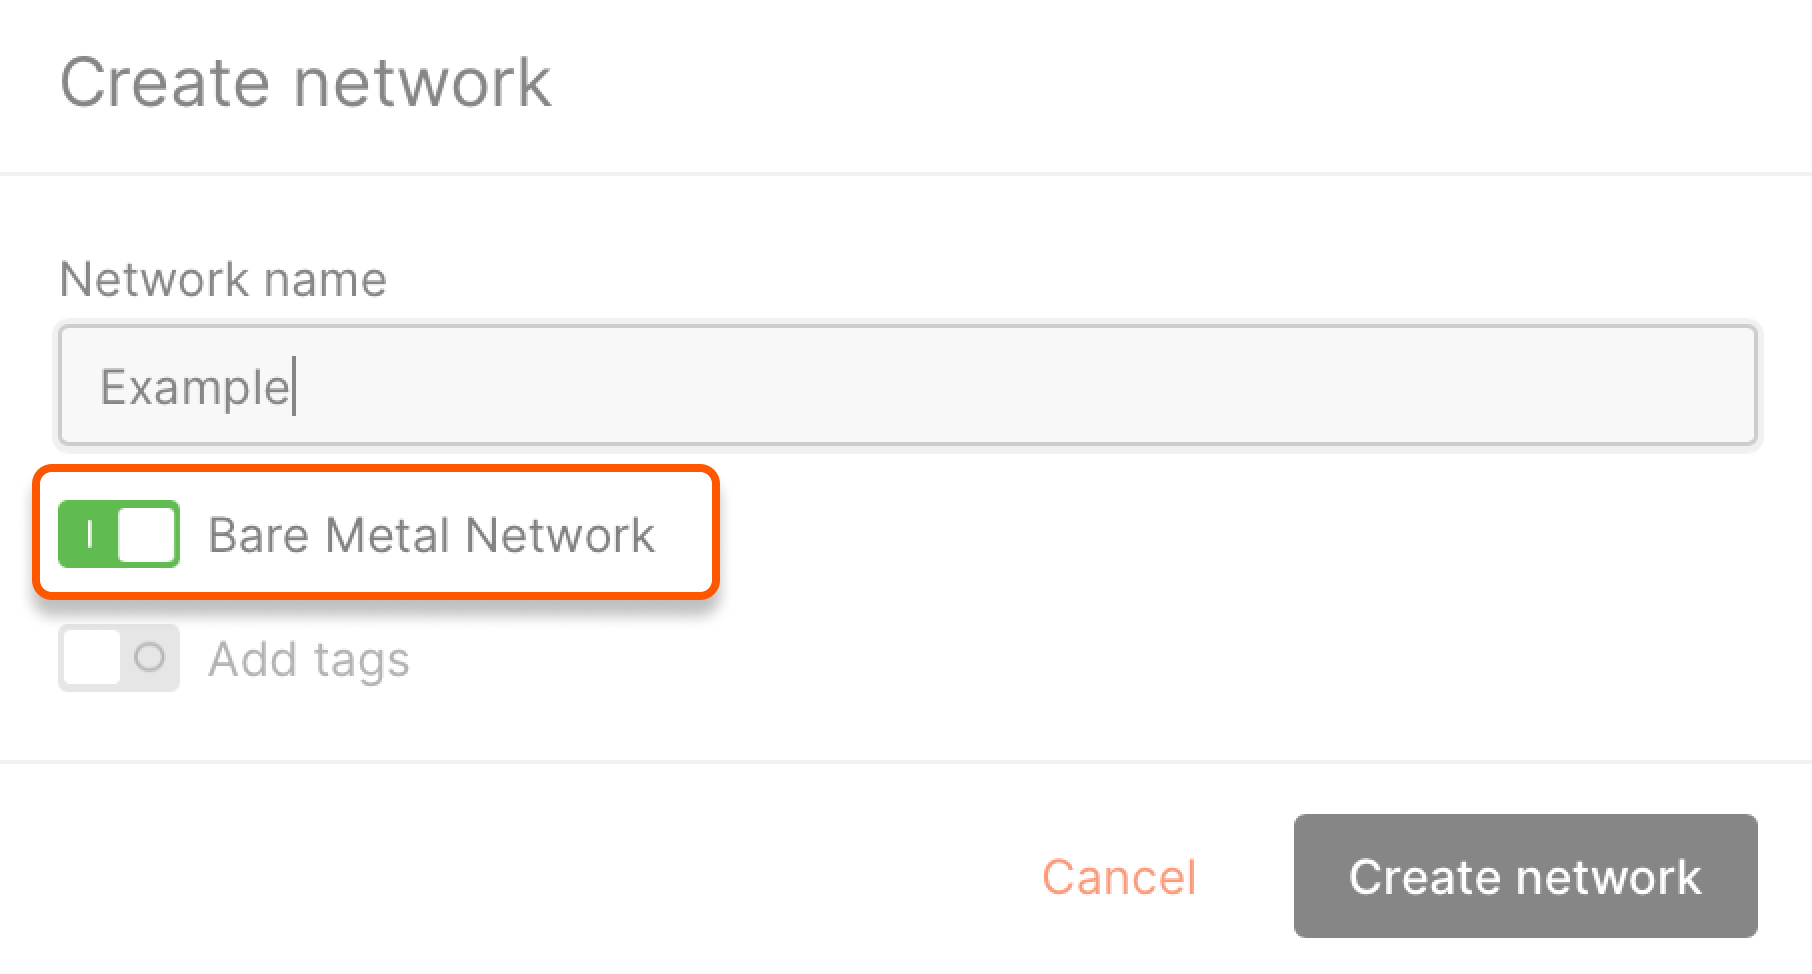
You must manually change the OS settings’ existing Bare Metal network interface.
Configure file shares for Linux VMs and Bare Metal
This section describes creating and connecting a standard NFS-based file share using a private network. It can be used with Linux virtual machines or bare-metal servers.Step 1: Create a file share
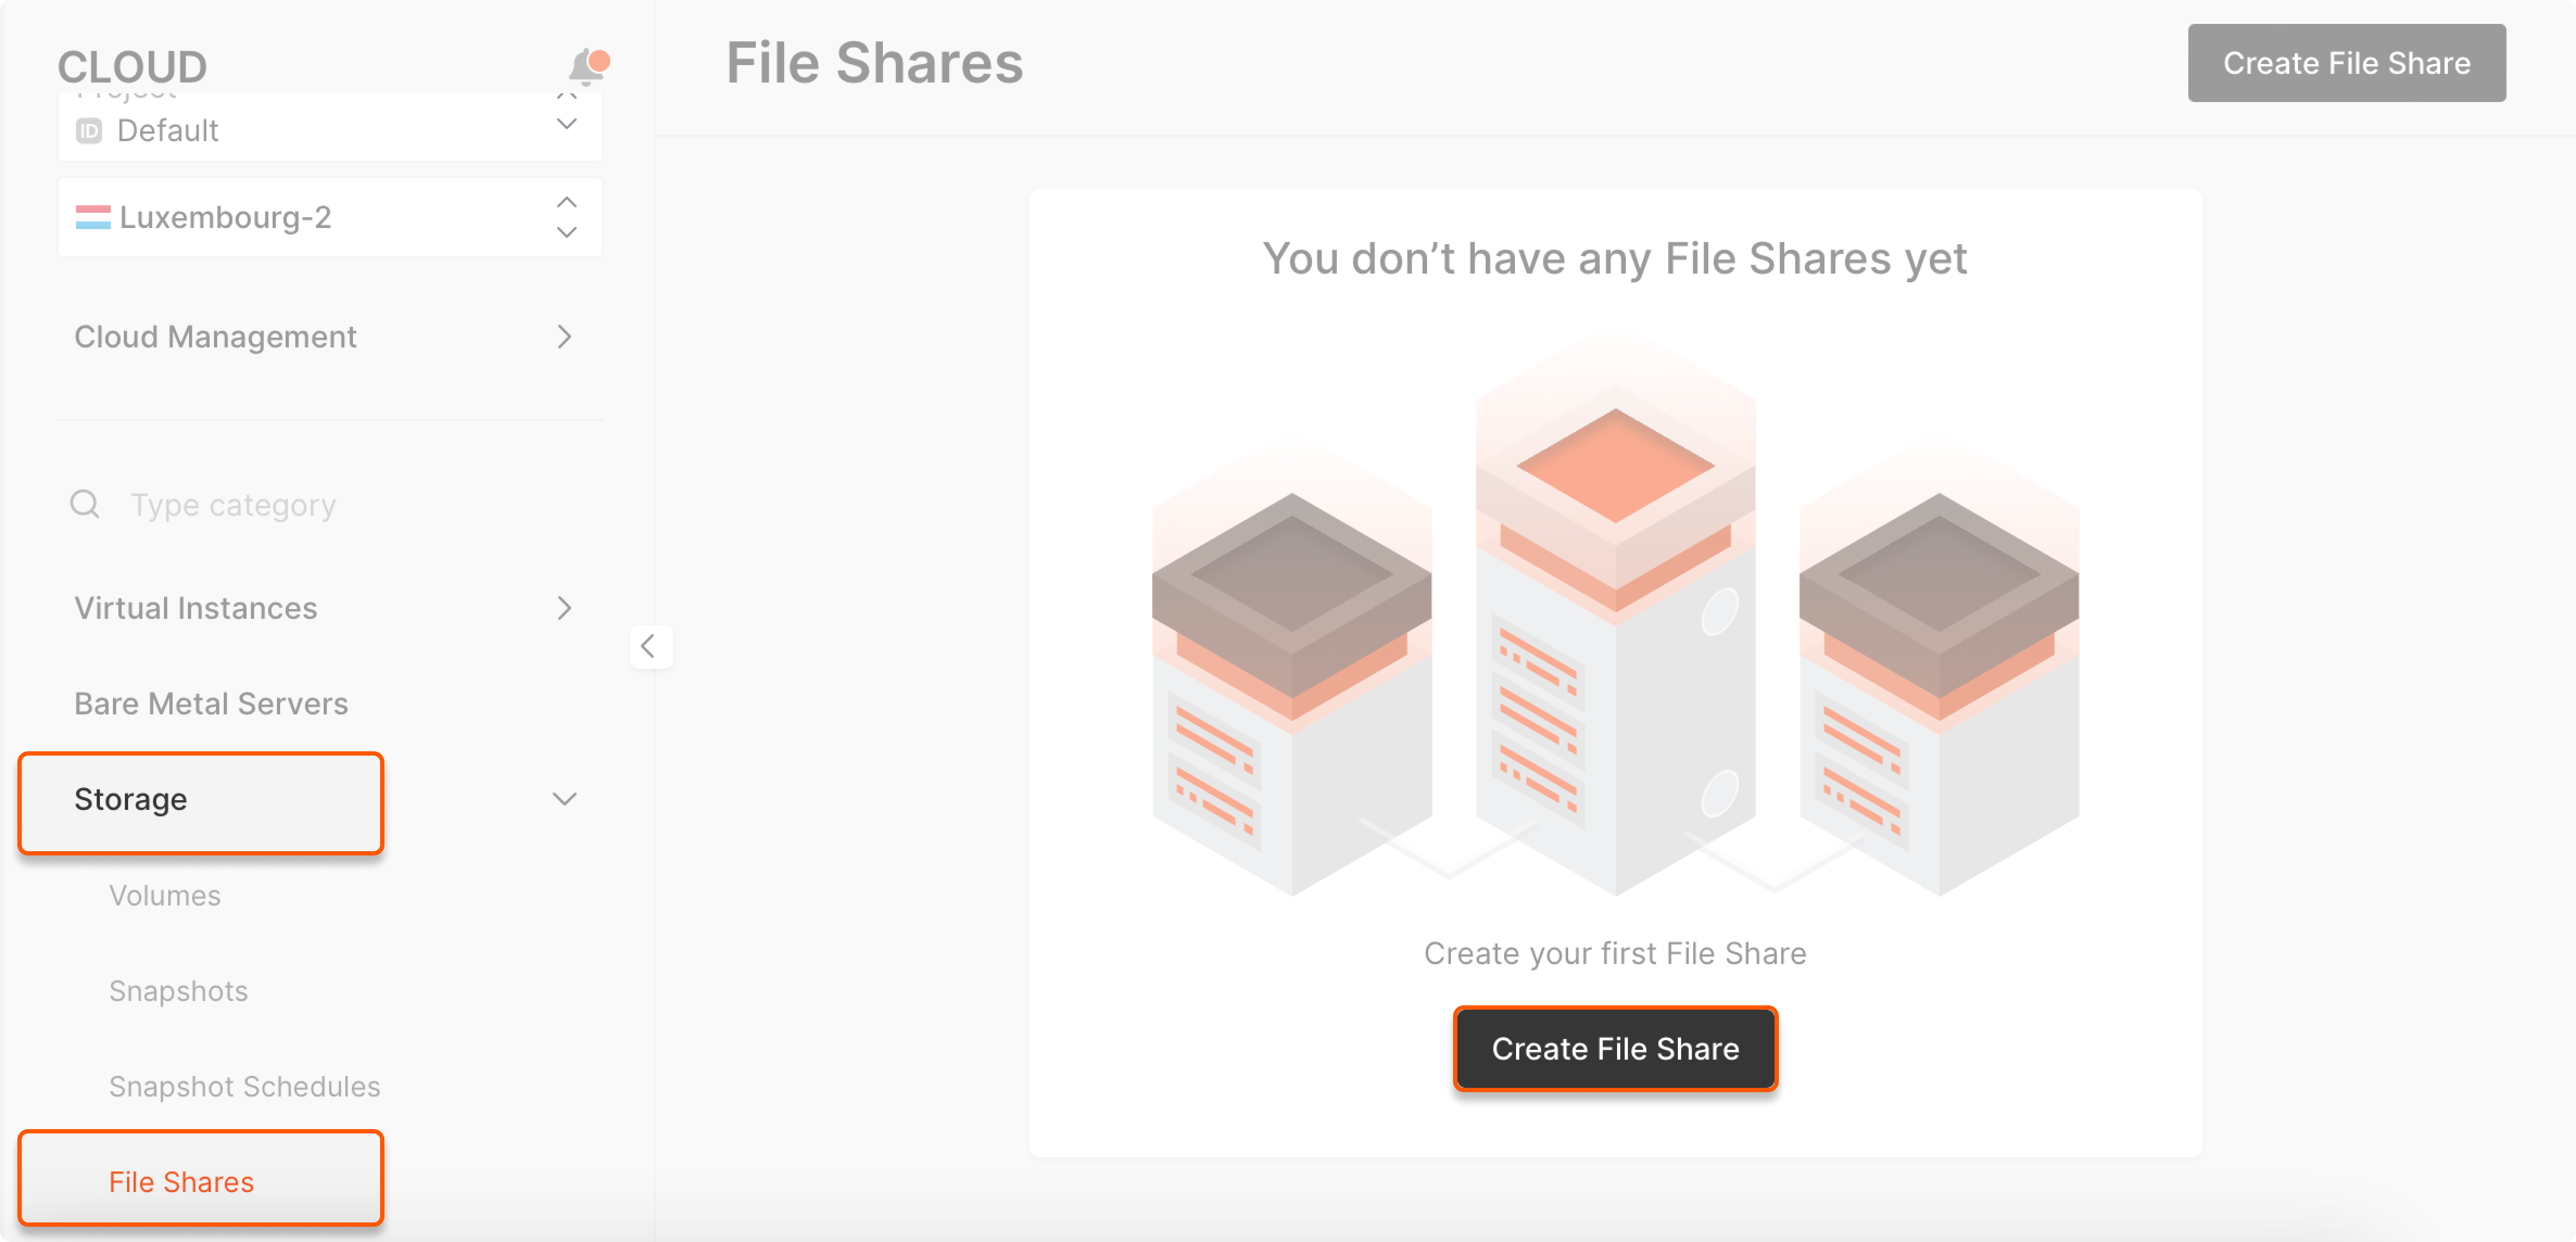
- In the Cloud menu, go to the Storage tab, select File Shares, and click Create File Share.
- A new page will open. In Basic settings, enter the name of the file share, specify its size, and select Standard as the type.
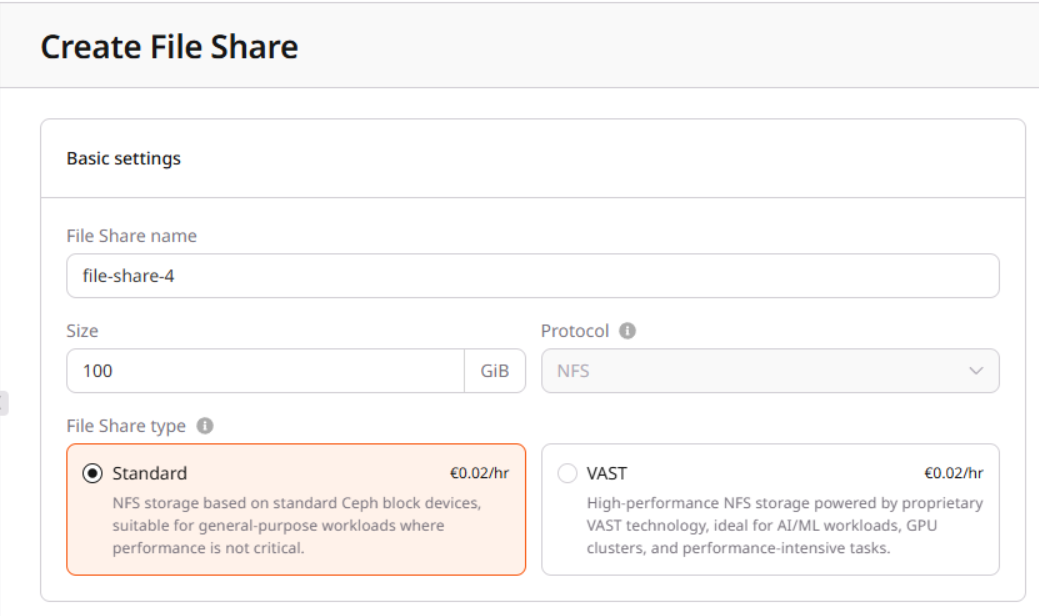
- In the File Share network settings, select the private network and subnetwork you will use for file sharing.
- In Access, click Add rule and specify the IP addresses of the machines that should have access to the file share and their access modes.
- (Optional) Add tags.
Step 2: Connect to your server
Connect to your server via the Gcore Customer Portal or SSH and install the NFS client to enable your system to access the file share. For Ubuntu and Debian:sudo apt -y install nfs-common
For CentOS:
sudo yum install nfs-utils
Step 3: Mount the file share
- Choose or create a file directory to mount the shared files.
- Go to the required file share Overview tab and copy the mount command from the File Share mount section.
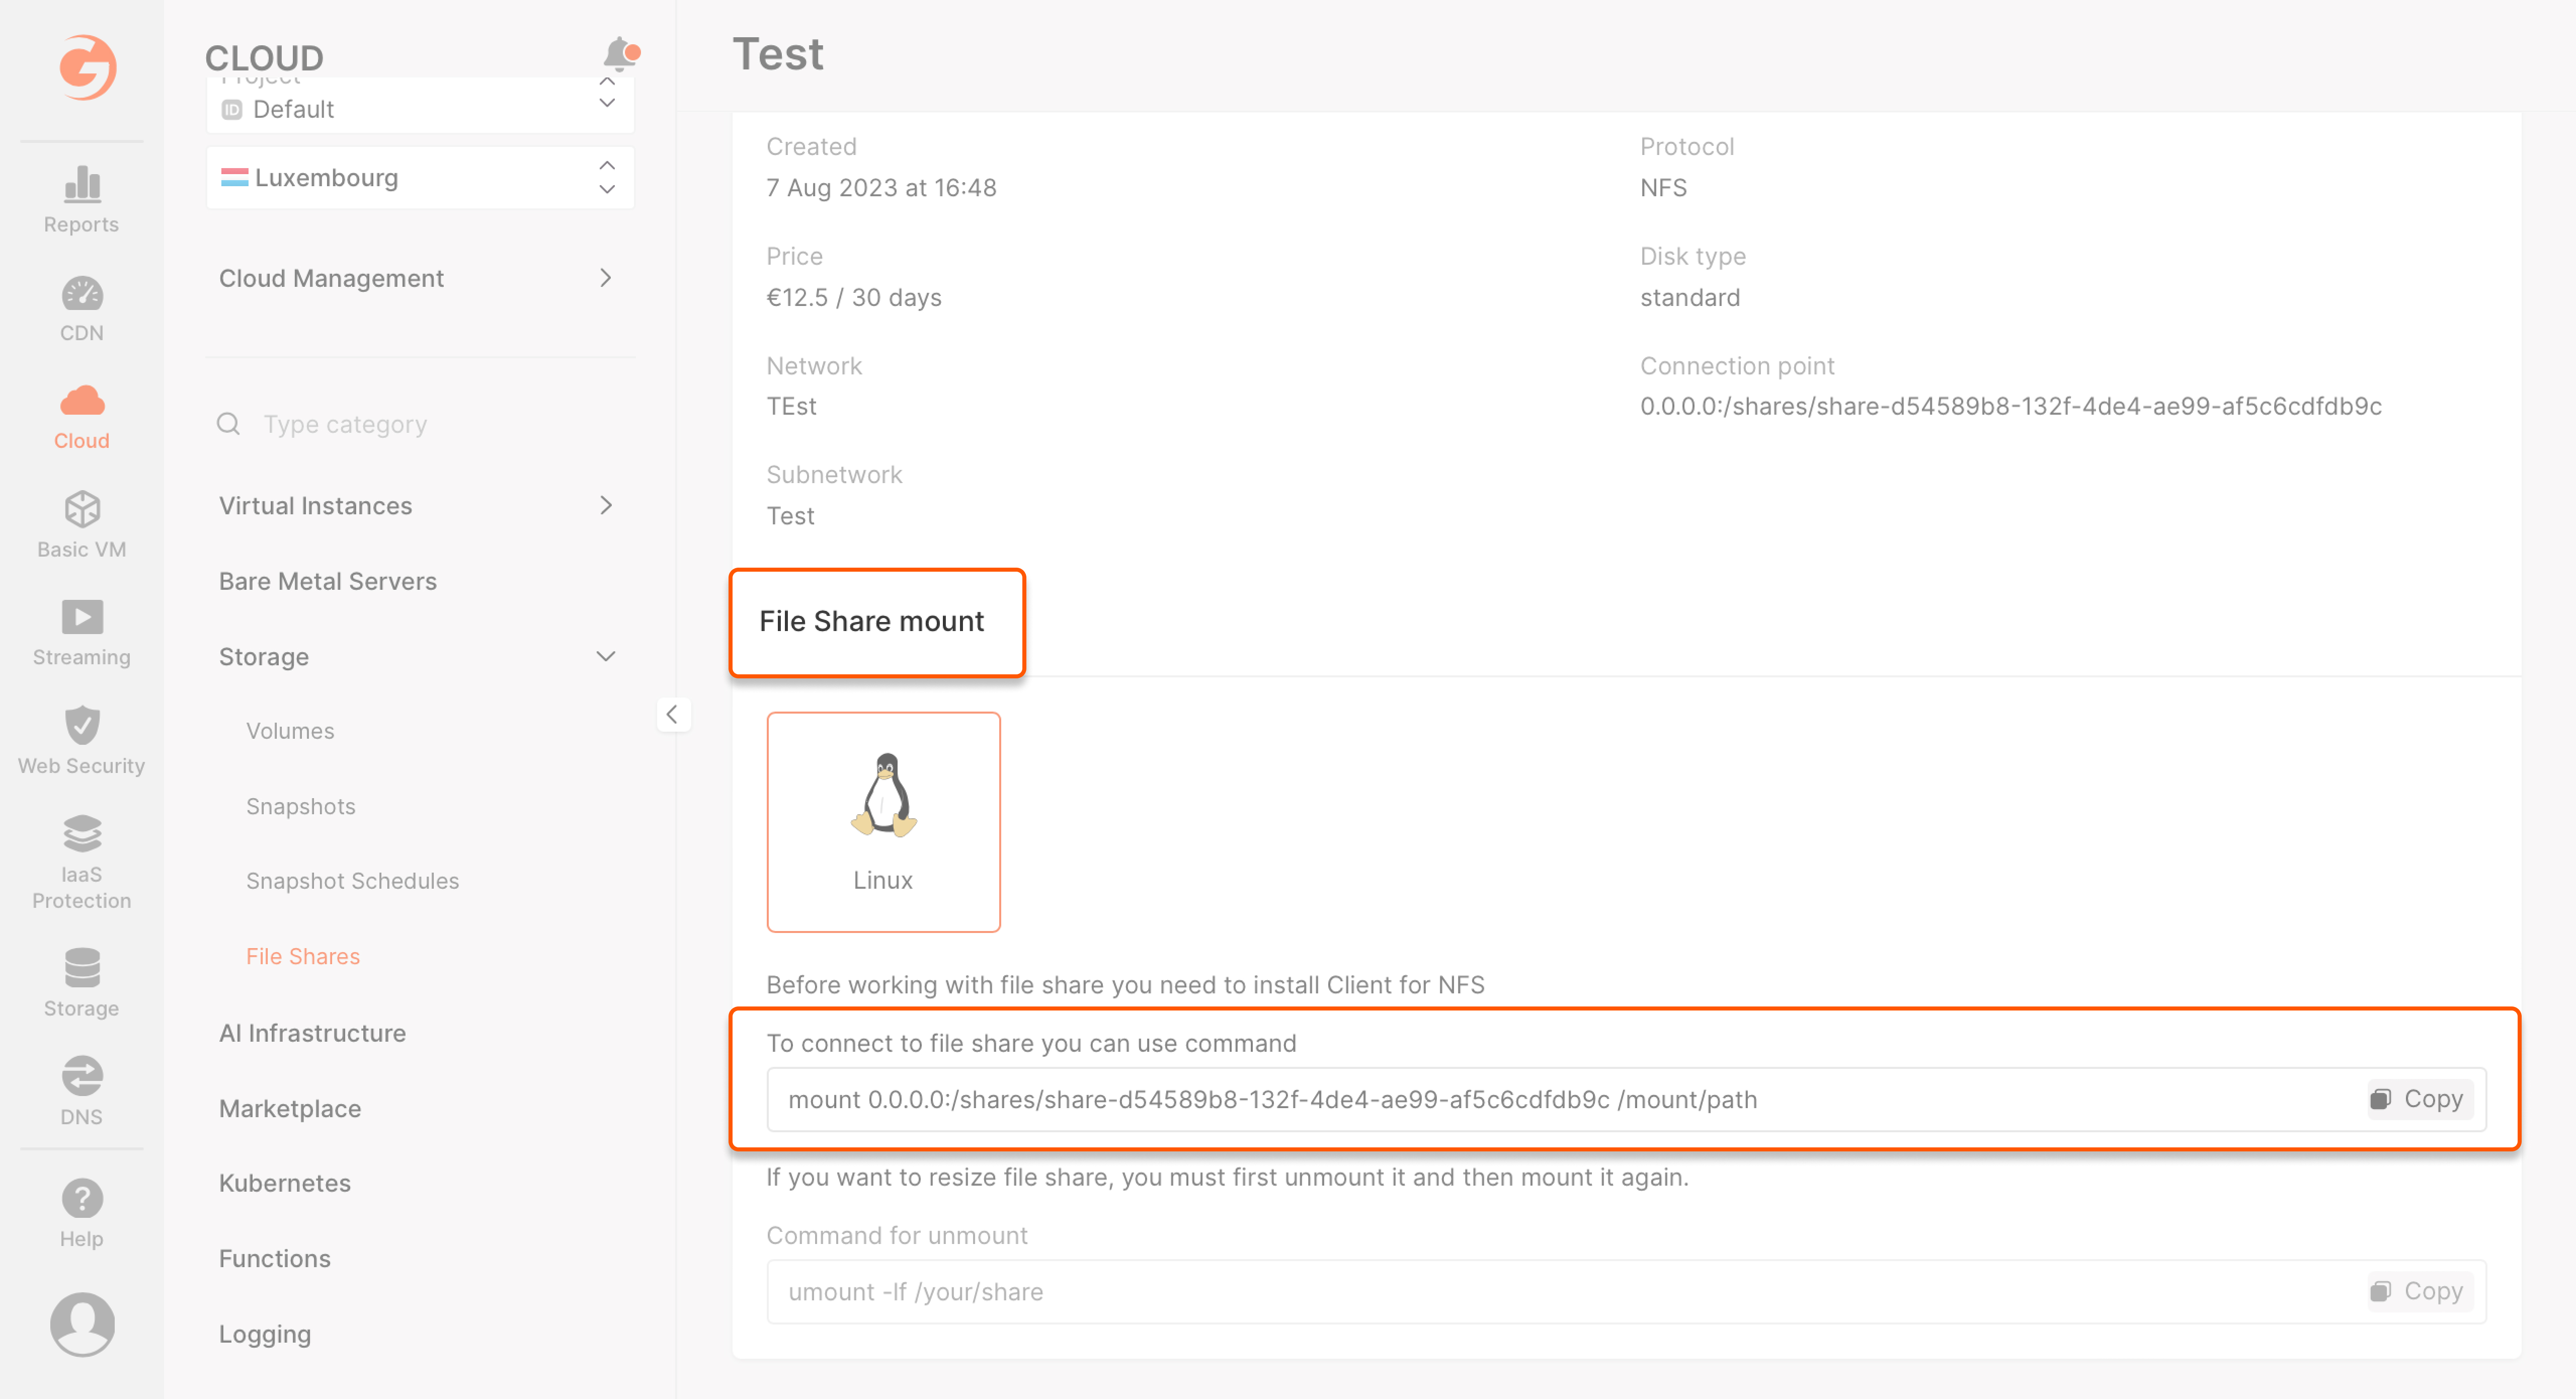
mount 0.0.0.0:/shares/share-d54589b8-132f-4de4-ae99-af5c6cdfdb9c /mount/path
Replace /mount/path with the path to the local file directory where you want to mount the file share.
VAST file shares
The VAST-based file share type is available only in regions with GPU support. It uses a high-performance backend designed for intensive data workloads.
Step 1: Create a file share
- In the Cloud menu, go to the Storage tab, select File Shares, and click Create File Share. A new page will open.
- In Basic settings, enter the name of the file share, specify its size
- Select VAST as the type.
- (optional) Add tags.
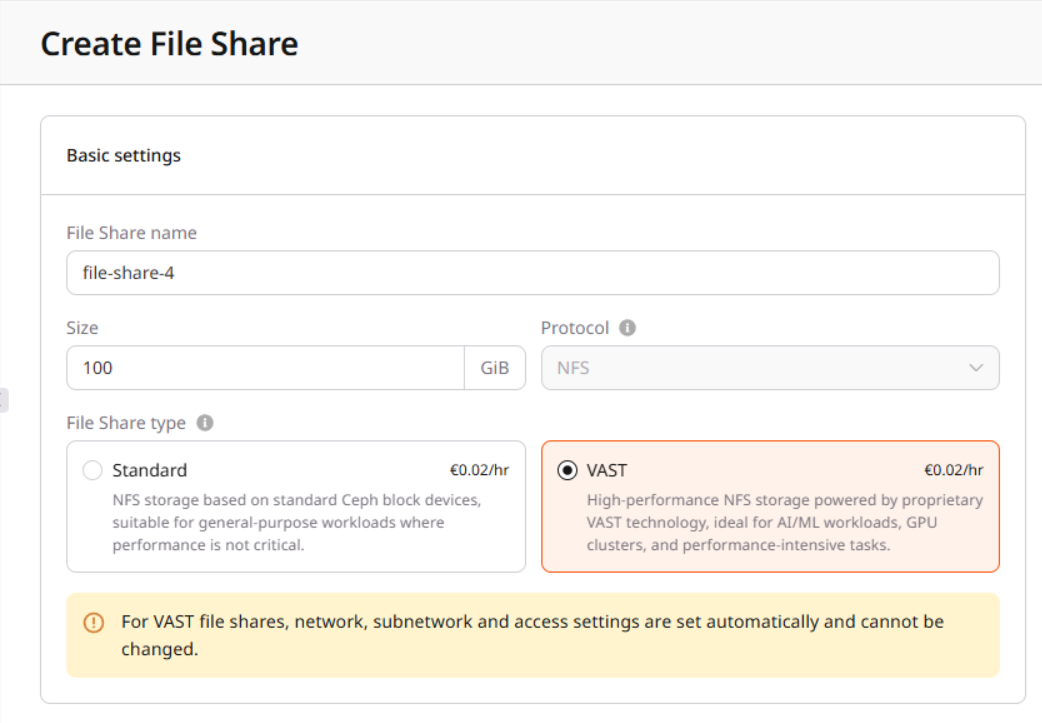 When selecting VAST as the file share type, the interface disables the Network and Access settings.
The network is assigned automatically, and you cannot configure access rules manually — the VAST share is always available in read/write mode within its assigned network only. This network is not visible in the general Network tab. It is only available when attaching interfaces to a resource (VM, Bare Metal, or GPU Cluster).
VAST file shares always use read/write access. Access rules are not supported.
When selecting VAST as the file share type, the interface disables the Network and Access settings.
The network is assigned automatically, and you cannot configure access rules manually — the VAST share is always available in read/write mode within its assigned network only. This network is not visible in the general Network tab. It is only available when attaching interfaces to a resource (VM, Bare Metal, or GPU Cluster).
VAST file shares always use read/write access. Access rules are not supported.
Step 2: Attach the VAST interface to your server
You can attach the VAST interface during or after the creation of your compute resource. Once the file share is created:- Go to the **resource **settings (VM, Bare Metal, or GPU Cluster).
- Open the Interfaces section.
- Click Add interface.
- In the Network dropdown, select the VAST network.
- Click Apply.
Step 3: Mount the file share
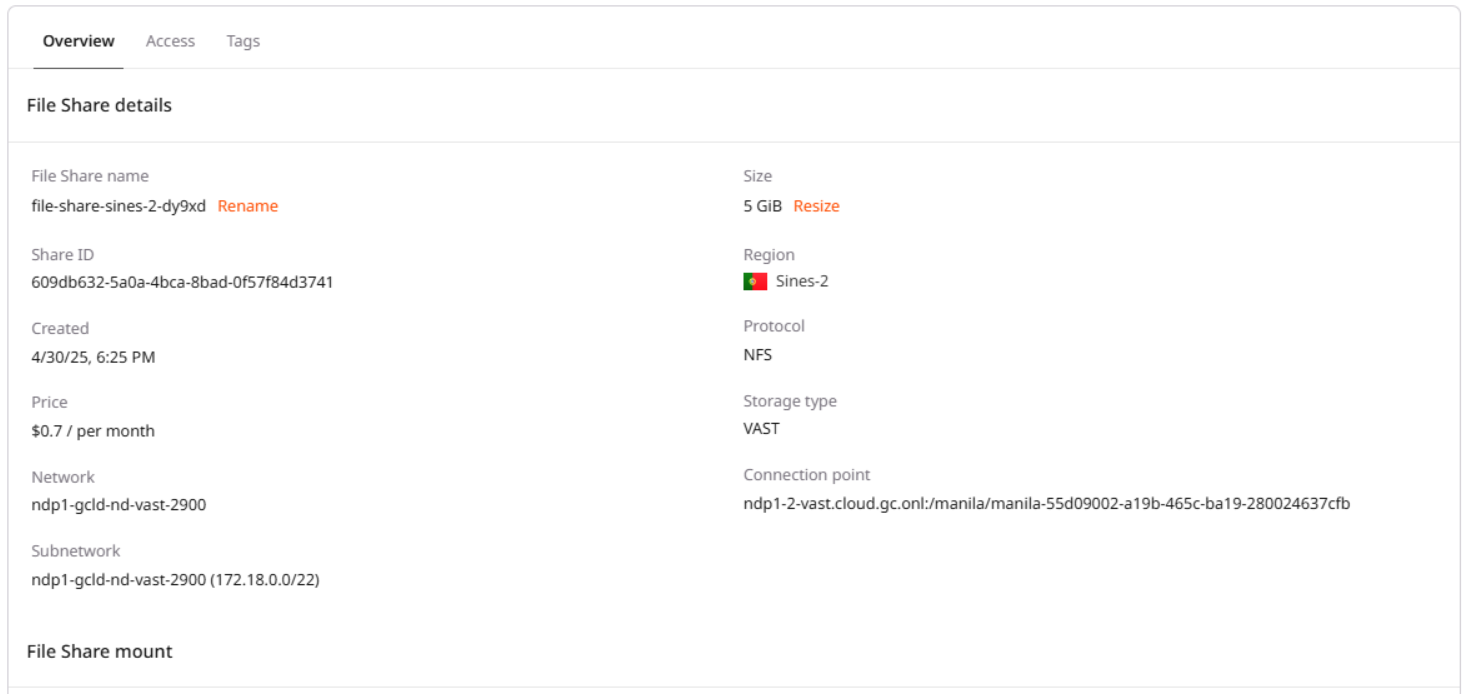
Create or choose a directory where you want to mount the file share. Run the mount command provided by the customer support or your file share overview. For example:sudo mount -o vers=3,nconnect=56,remoteports=dns,spread_reads,spread_writes ndp1-2-vast.cloud.gc.onl:/manila/manila-55d09002-a19b-465c-ba19-280024637cfb /mount/path
Now you can access the contents of the VAST file share in the specified directory.
Always use NFS version 3 (vers=3) when mounting VAST file shares. If your system does not support the
nconnect option, install the VAST Enhanced NFS Client.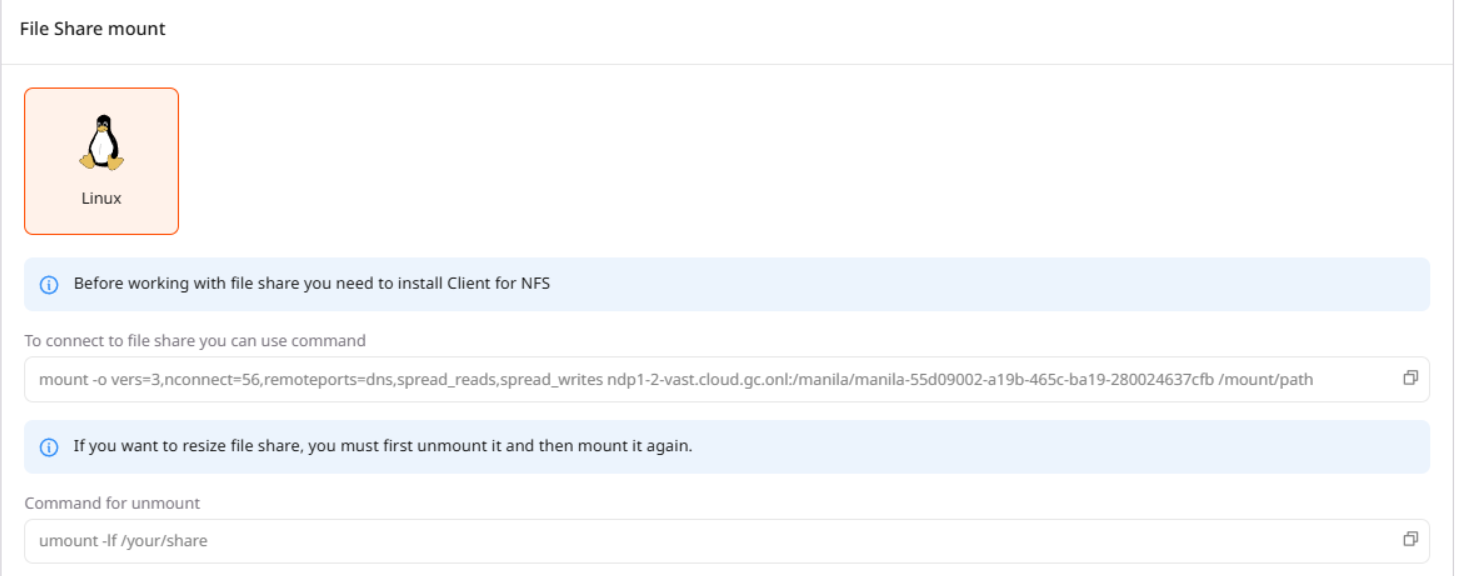
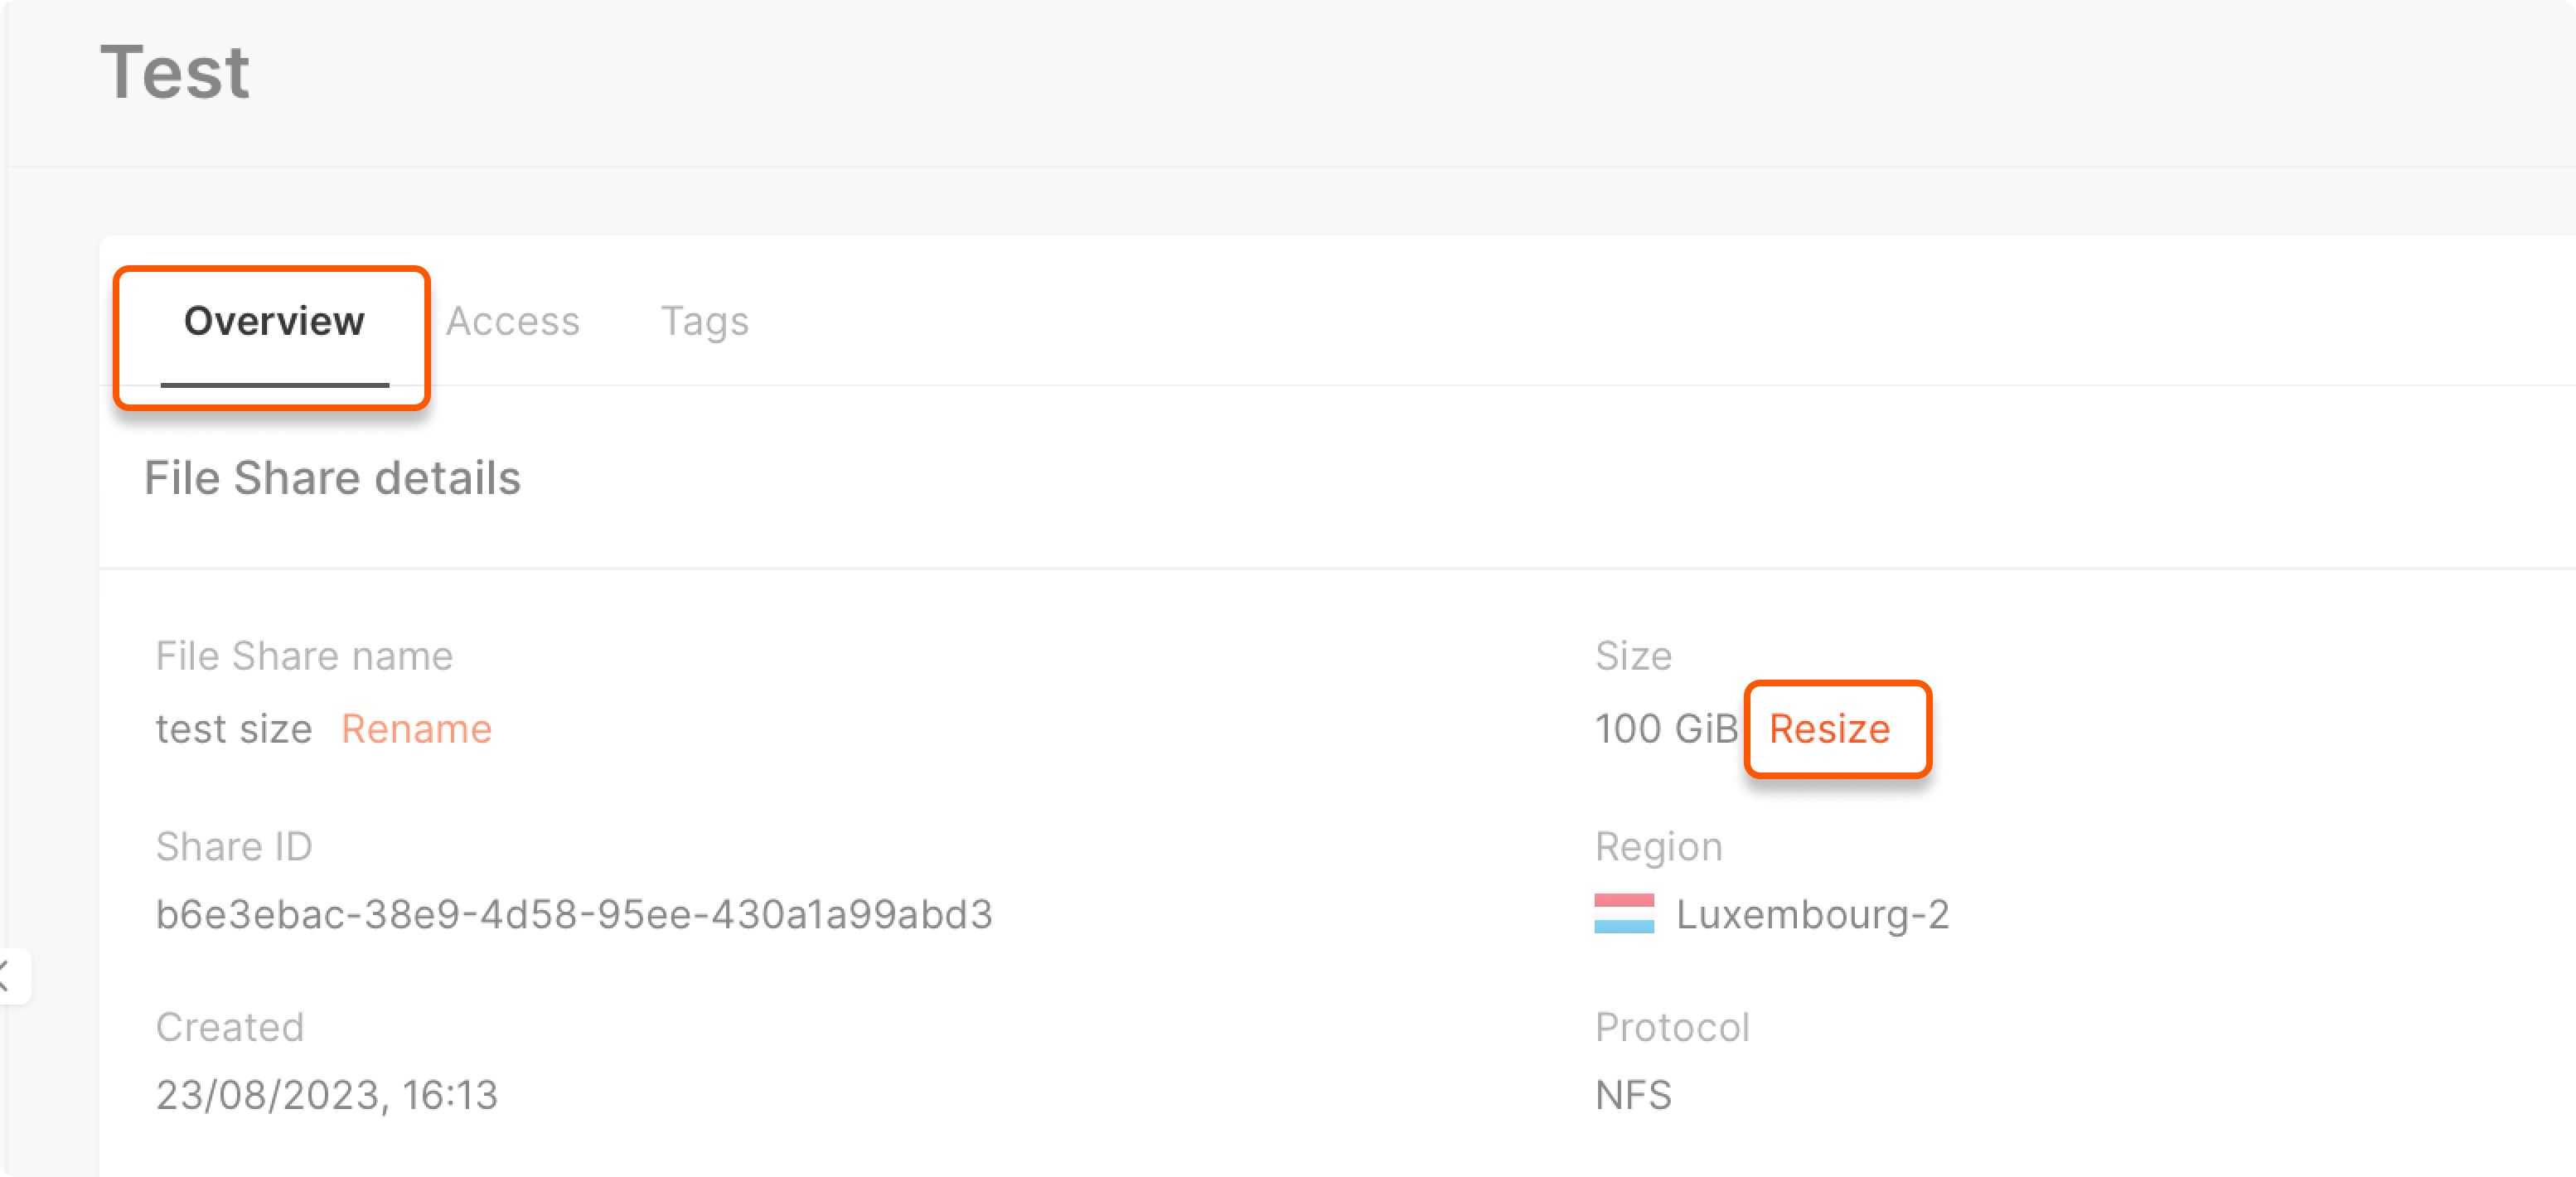
Change size and unmount a file share
If you want to change the file share size, you must unmount it and then remount it. To unmount a file share:umount -lf /your/share
To resize your file share, go to the Overview tab and click Resize as shown below.